Having a mini NAS is a big benefit because of its performance and efficiency. Sometimes the storage needs increase, and you are left with no choice but to install a new SSD in your mini NAS.
Adding an SSD to a mini NAS gives you faster file access and better responsiveness for media or backup tasks. The SSD in the mini NAS helps in getting quieter operation.
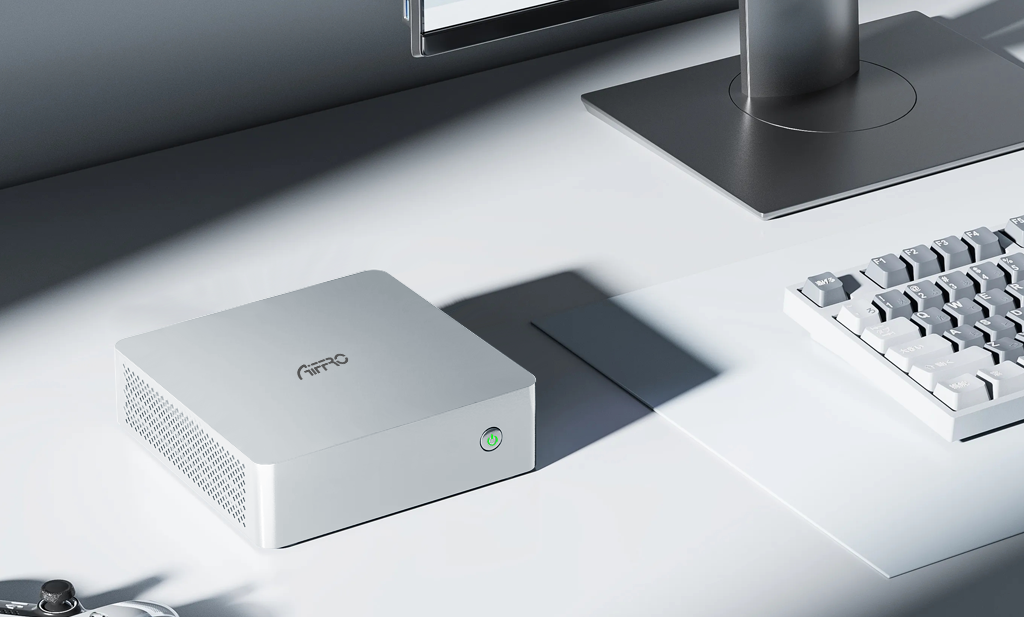
Aiffro discusses everything in this guide about why SSDs matter and how to pick the right drive, along with a clear, step-by-step installation process. It also shows how to configure storage and avoid common mistakes. Let’s understand this from the basics.
Why Upgrade Your Mini NAS with an SSD?
SSDs are a better option for a mini NAS than hard drives because they read and write data far faster. This faster process speeds up file transfers and cuts latency when streaming and editing large files. Another benefit of SSDs is that it has no spinning parts. This feature helps them to run quietly and handle vibration better. SSDs are an ideal choice for many home and small office setups, as you will notice a day-to-day improvement in workflow.
Things to Consider Before Installing an SSD in Your Mini NAS
Before you buy or unbox the product, check these points.
Form factor and protocol:
Confirm that you have a mini NAS that accepts M.2 NVMe drives, not M.2 SATA drives.
Capacity needs:
Choose the size that fits your storage plans. Make sure to leave extra space beyond your immediate need for future plans.
Endurance:
Always look for drives that have good write endurance. This is specifically necessary if backups or heavy writes are routine.
Backups first:
It is important to back up your data before changing drives or RAID.
Tools:
The only tools you need are a small Phillips screwdriver and a clean surface.
Choosing the Right SSD for Your Mini NAS
SSDs are not always the same, so you need to carefully pick one that matches your mini NAS slots and workload.
- NVMe vs SATA: Use only NVMe for better speed in a mini NAS that supports NVMe. It's not good to try to install a SATA M.2 in a slot that only supports NVMe.
-
Next is to check the form factor. Check that the NAS you are using has an M.2 slot that supports 2280 drives. Some NAS boxes may only support shorter or different M.2 sizes.
- 2230 (22mm x 30mm)
- 22110 (22mm x 110mm)
- A NAS that doesn't support M.2 2280, you will need to find a compatible drive or use different form factors.
- The next thing to check is the endurance rating. Choose SSDs that list higher TBW (terabytes written) for constant writes.
- Use matching capacities across bays for redundant setups. For single-disk setups, choose the largest drive you can afford.
Step-by-Step Guide: How to Install an SSD to the Mini NAS
Follow these steps for a safe installation of an SSD to the mini NAS. I keep steps simple and clear.
Step 1 — Power down and unplug
Shut the NAS down via its shutdown option. Unplug the power cable and network. Confirm no power to the unit.
Step 2 — Prepare your workspace
Work on a clean, flat surface. Keep screws and tiny parts organized. Avoid static by touching a grounded metal object first.
Step 3 — Open the enclosure
Lay the NAS on its top and remove the bottom screws. Lift the cover. Keep screws in a small container.
Step 4 — Find the M.2 slots
Locate the M.2 slots. Most mini NAS devices place them on the main board and mark the slot type. If unsure, check the manual.
Step 5 — Insert the SSD
Align the drive with the slot notches. Insert the drive at a shallow angle, then press down to lay it flat. Secure it with the small screw. Do not over tighten.
Step 6 — Reassemble
Replace the cover and screws. Reattach any feet or pads. Reconnect power and network.
Step 7 — Boot and check detection
Power on and enter the NAS firmware or BIOS if needed. Check that the drive shows up. If it does not, recheck the seating and the screw.
Configuring Your SSD in the Mini NAS
After physically installing the SSD in a mini NAS, set up the drive within the NAS software.
- Format and partition: Use the NAS tools to format the drive. Choose a filesystem your NAS supports.
- Select RAID or single disk: If you want redundancy, pick a mirrored setup. Pick a single volume if you want maximum space.
- Set cache or tiering: If the NAS offers SSD caching, decide if you want cache or direct storage. Caching helps when a mix of HDD and SSD exists.
- Enable TRIM: A NAS OS that supports TRIM for NVMe, enabling it to maintain healthy SSD performance.
- Monitor health: Enable SMART monitoring so the NAS reports drive health and remaining life.
Common Mistakes to Avoid When Installing an SSD in a Mini NAS
Installation is an easy process, but it needs care as you have to avoid these common errors for successful completion of the task.
- Installing the wrong M.2 type. Some slots only accept NVMe.
- Overtightening the tiny screw. It can crack the drive or board.
- Skipping backups before changing RAID. That risks data loss.
- Forgetting cooling needs when all bays are populated. Dense SSD installs raise temperature.
- Using mismatched drives in RAID without matching capacity and endurance.
Maintaining Your SSD for Long-Term Performance
A few checks keep SSDs healthy.
- Check SMART status regularly. Address any warnings fast.
- Keep firmware up to date for both NAS and SSD firmware when available.
- Leave some free space on each SSD. Drives perform better when not full.
- Watch temperatures during heavy use. If temps climb, improve ventilation.
Get Fast Performance and Enhanced Storage by Installing an SSD in the Aiffro Mini NAS K100
If you own an Aiffro Mini NAS K100, it is built to hold multiple M.2 NVMe drives and make SSD upgrades easy. The K100 supports four M.2 2280 NVMe slots (PCIe Gen3×2), so you can install up to four NVMe drives for space or RAID performance.
The unit runs on an Intel N100 CPU and ships with 8 GB LPDDR5 memory. Those specs are a good match for multi-drive SSD setups and light server tasks. The K100 size is small and uses an aluminum shell that helps with passive cooling.
Important detail: the K100 does not accept M.2 SATA protocol drives in its M.2 slots. Only NVMe M.2 SSDs are supported. Check the drive type before buying.
Aiffro documents also note support for a 2.5 G Ethernet connection and RAID options in their guides. That gives fast local access, though network speed can still limit transfers compared with peak NVMe speeds.
How to Install SSDs in the Aiffro Mini NAS K100
Those who have a mini NAS K100 are at a benefit because of its efficient performance and lightweight features with quiet operation. Here is the guide for installing an SSD in your mini NAS K100 to enhance storage and performance.
- Make sure the device is shut down completely and disconnected from power.
- The K100 has rubber feet pads underneath. Remove them carefully, along with the screws that are underneath.
- Take off the bottom plate to expose the internals after removing the screws.
- You’ll see four M.2 2280 slots. Two may already have SSDs (depending on which model you bought).
-
Insert the SSD
- Align the notch on the SSD with the slot.
- Insert at an angle (usually ~30°), then gently push down.
- Use the screw provided to fix it down. Don’t overtighten.
- If there’s a heat sink or shield that covers the SSD area, reinstall it. It helps with cooling.
- Put the bottom plate back, add screws, and reattach the rubber feet.
- Once assembled, power on. If necessary, enter BIOS or firmware to ensure the SSDs are recognized. If they don’t show up, check seating and connections.
-
Initialize SSDs in the OS
- Partition/format each SSD.
- If using RAID, set that up, like RAID 1 for redundancy and RAID 5/10 if supported.
- If creating an OS install drive, you might use one SSD or an external boot drive. The K100 doesn’t come with OS installed.
Conclusion
Installing an SSD in a mini NAS is one of the most effective upgrades you can do. It gives faster file access, quieter operation, and better durability.
Follow the checks, use the right M.2 NVMe drives, back up first, and configure the storage in the NAS software after installation.
If you use an Aiffro Mini NAS K100, the device is ready for a four-drive NVMe setup. The all SSD NAS K100 is a good example of a mini NAS designed around SSDs.

Laisser un commentaire
Ce site est protégé par hCaptcha, et la Politique de confidentialité et les Conditions de service de hCaptcha s’appliquent.